
App Settings
The App Settings screen is where Jira Administrators configure global settings that affect how Dashlytics calculates Metrics across all reports. It is accessed via Jira settings → Marketplace apps, then App Settings under Dashlytics in the sidebar.
The settings are organised under the Report options tab. Changes take effect across all reports after clicking Save changes.
For a conceptual explanation of what each setting does and when to customise it, see App Configuration in the Settings & Administration section.
Lifecycle Mapping
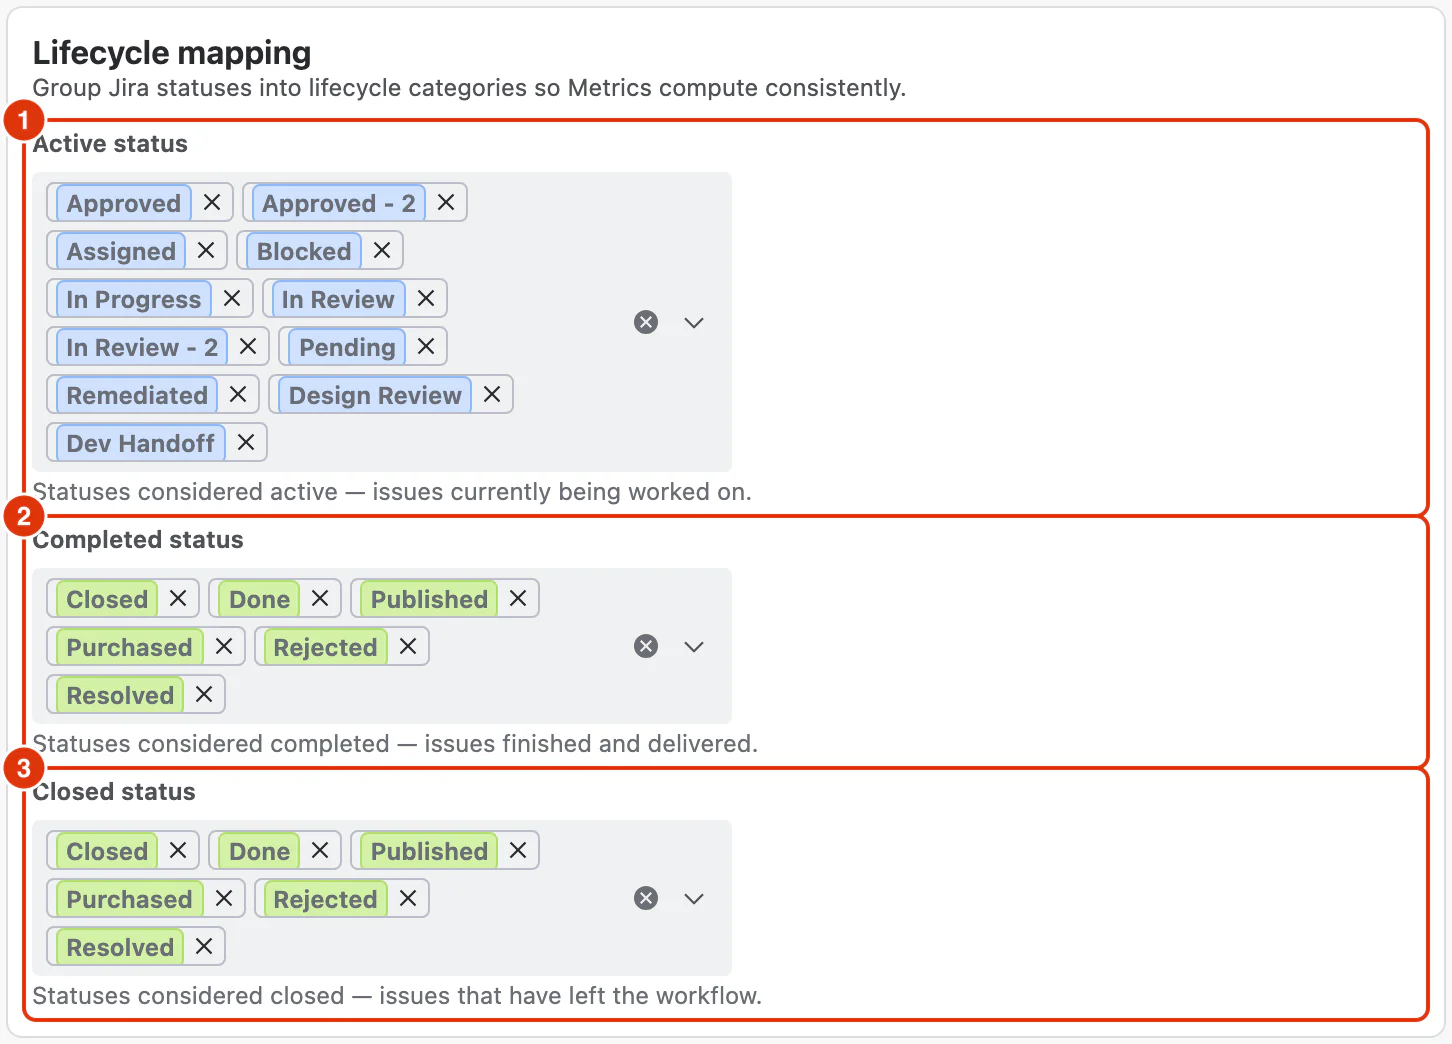
Lifecycle Mapping lets you define which Jira statuses correspond to each of the three lifecycle states used by Metrics in Dashlytics.
Each field is a multi-select dropdown showing all status names from your Jira instance. You can search within each dropdown to find a specific status quickly, and remove a mapped status with its ×.
Note: Mappings use status names, not IDs. This ensures consistent behaviour across all project types. See App Configuration for more detail.
Active status
Active status (1) — select the statuses where work is genuinely in progress, meaning someone is actively working on the work item. Statuses that represent a waiting or on-hold state should not be included here.
Default: All statuses in the Jira In Progress status category.
Completed status
Completed status (2) — select the statuses that represent delivery being finished. The work is done, but the work item may not yet be administratively closed — for example, it may be waiting for customer confirmation or the next release cycle.
Default: All statuses in the Jira Done status category.
Closed status
Closed status (3) — select the statuses that represent the administrative close of a work item, when work is fully finished and it will not be revisited.
Default: All statuses in the Jira Done status category.
When calculating Metrics, Dashlytics treats Closed as a subset of Completed — every Closed work item is also considered Completed. This rule applies only to how Metrics interpret the lifecycle. You still select statuses independently for each state in this screen.
Story Point Mapping
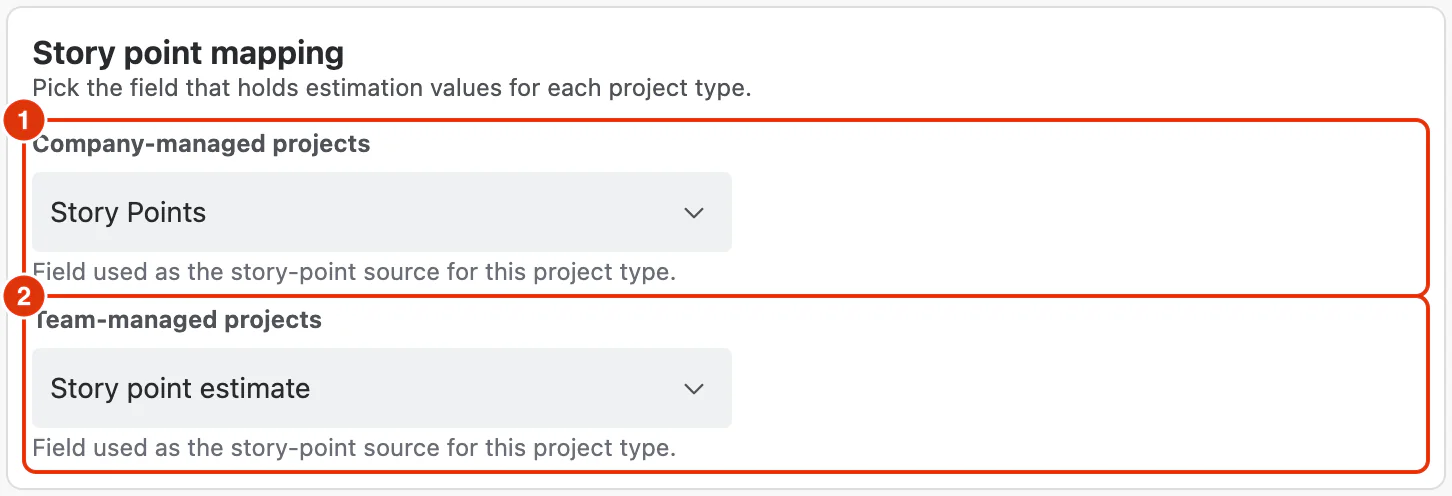
Story Point Mapping defines which number field Dashlytics uses as the Story Points value in reports. Since Jira uses different fields for story points depending on the project type, this mapping creates a unified Story Points value across all project types.
Each field is a searchable dropdown showing all number fields available in your Jira instance.
Company-managed projects
Company-managed projects (1) — the number field to use as Story Points for company-managed projects.
Default: Story Points
Team-managed projects
Team-managed projects (2) — the number field to use as Story Points for team-managed projects.
Default: Story point estimate
Save changes
Click Save changes to apply all changes. Both Lifecycle Mapping and Story Point Mapping are saved together in a single action.