
Configure Report
The Configure Report dialog is opened by clicking the Configure button in the Report Builder. It is the central place for defining the structure and calculations of your report.
The dialog has two tabs (1):
- Layout Designer — drag dimensions from the Dimensions list (2) into Filters (3), Rows (4), or Columns (5) to define how data is grouped and structured.
- Add Metrics — select and configure the Metrics that calculate the values shown in the report.
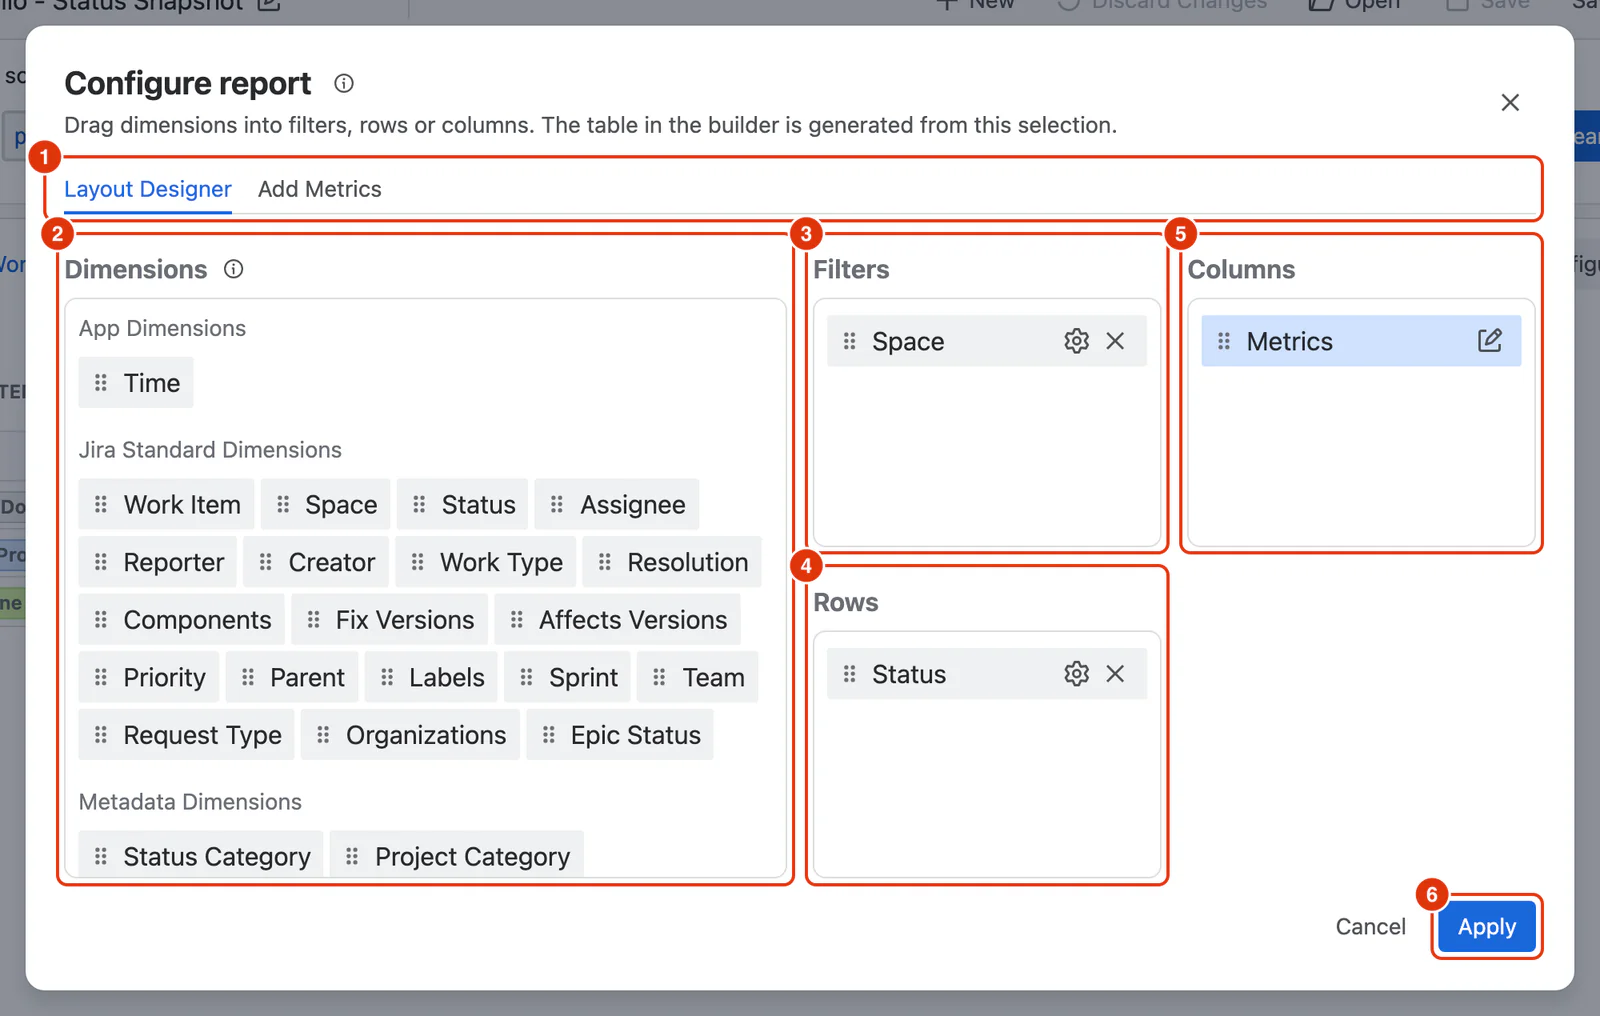
Click Apply (6) to close the dialog and update the report with your latest configuration. Click Cancel to close without applying changes.
A report requires at least one dimension in Rows and at least one Metric before it will render. Until both conditions are met, an appropriate message is shown in the report area.
In this section
- Layout Designer — placing dimensions into Filters, Rows and Columns
- Add Metrics — choosing and configuring the Metrics a report calculates
- Dimension Configuration — the options a placed dimension offers, by dimension type
Feature Guide
For a conceptual walkthrough of how to use the Configure dialog, see Configuring a Report in the Feature Guides section.