
Work Calendar Setup
Work Calendars define the working days, hours, and holidays used by time-based Metrics in Dashlytics. When a Metric calculates duration — such as Cycle Time, Lead Time, or Time in Status — it uses the selected Work Calendar to count only actual working time rather than full calendar days.
Work Calendars are set up by a Jira Administrator and are then available to all users when configuring time-based Metrics in their reports.
Accessing Work Calendars
Go to Jira settings → Marketplace apps, then click Calendar under Dashlytics in the sidebar.
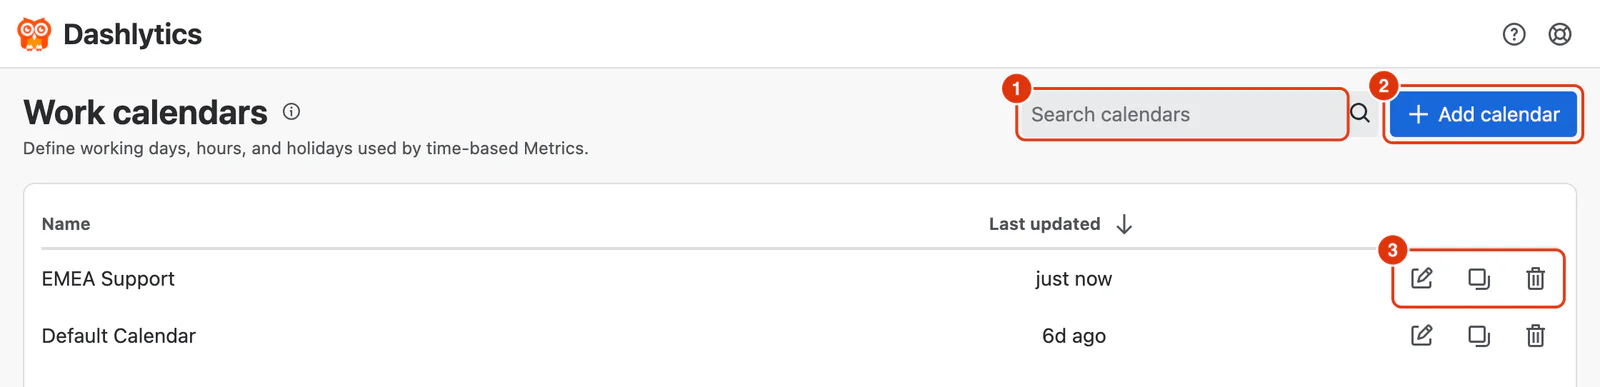
The Work calendars screen lists every calendar by Name, with when it was Last updated. Use Search calendars (1) to find one by name, click Add calendar (2) to create one, or use the icons at the end of a row (3) to edit, duplicate or delete it, as described under Managing a Calendar.
Adding a Calendar
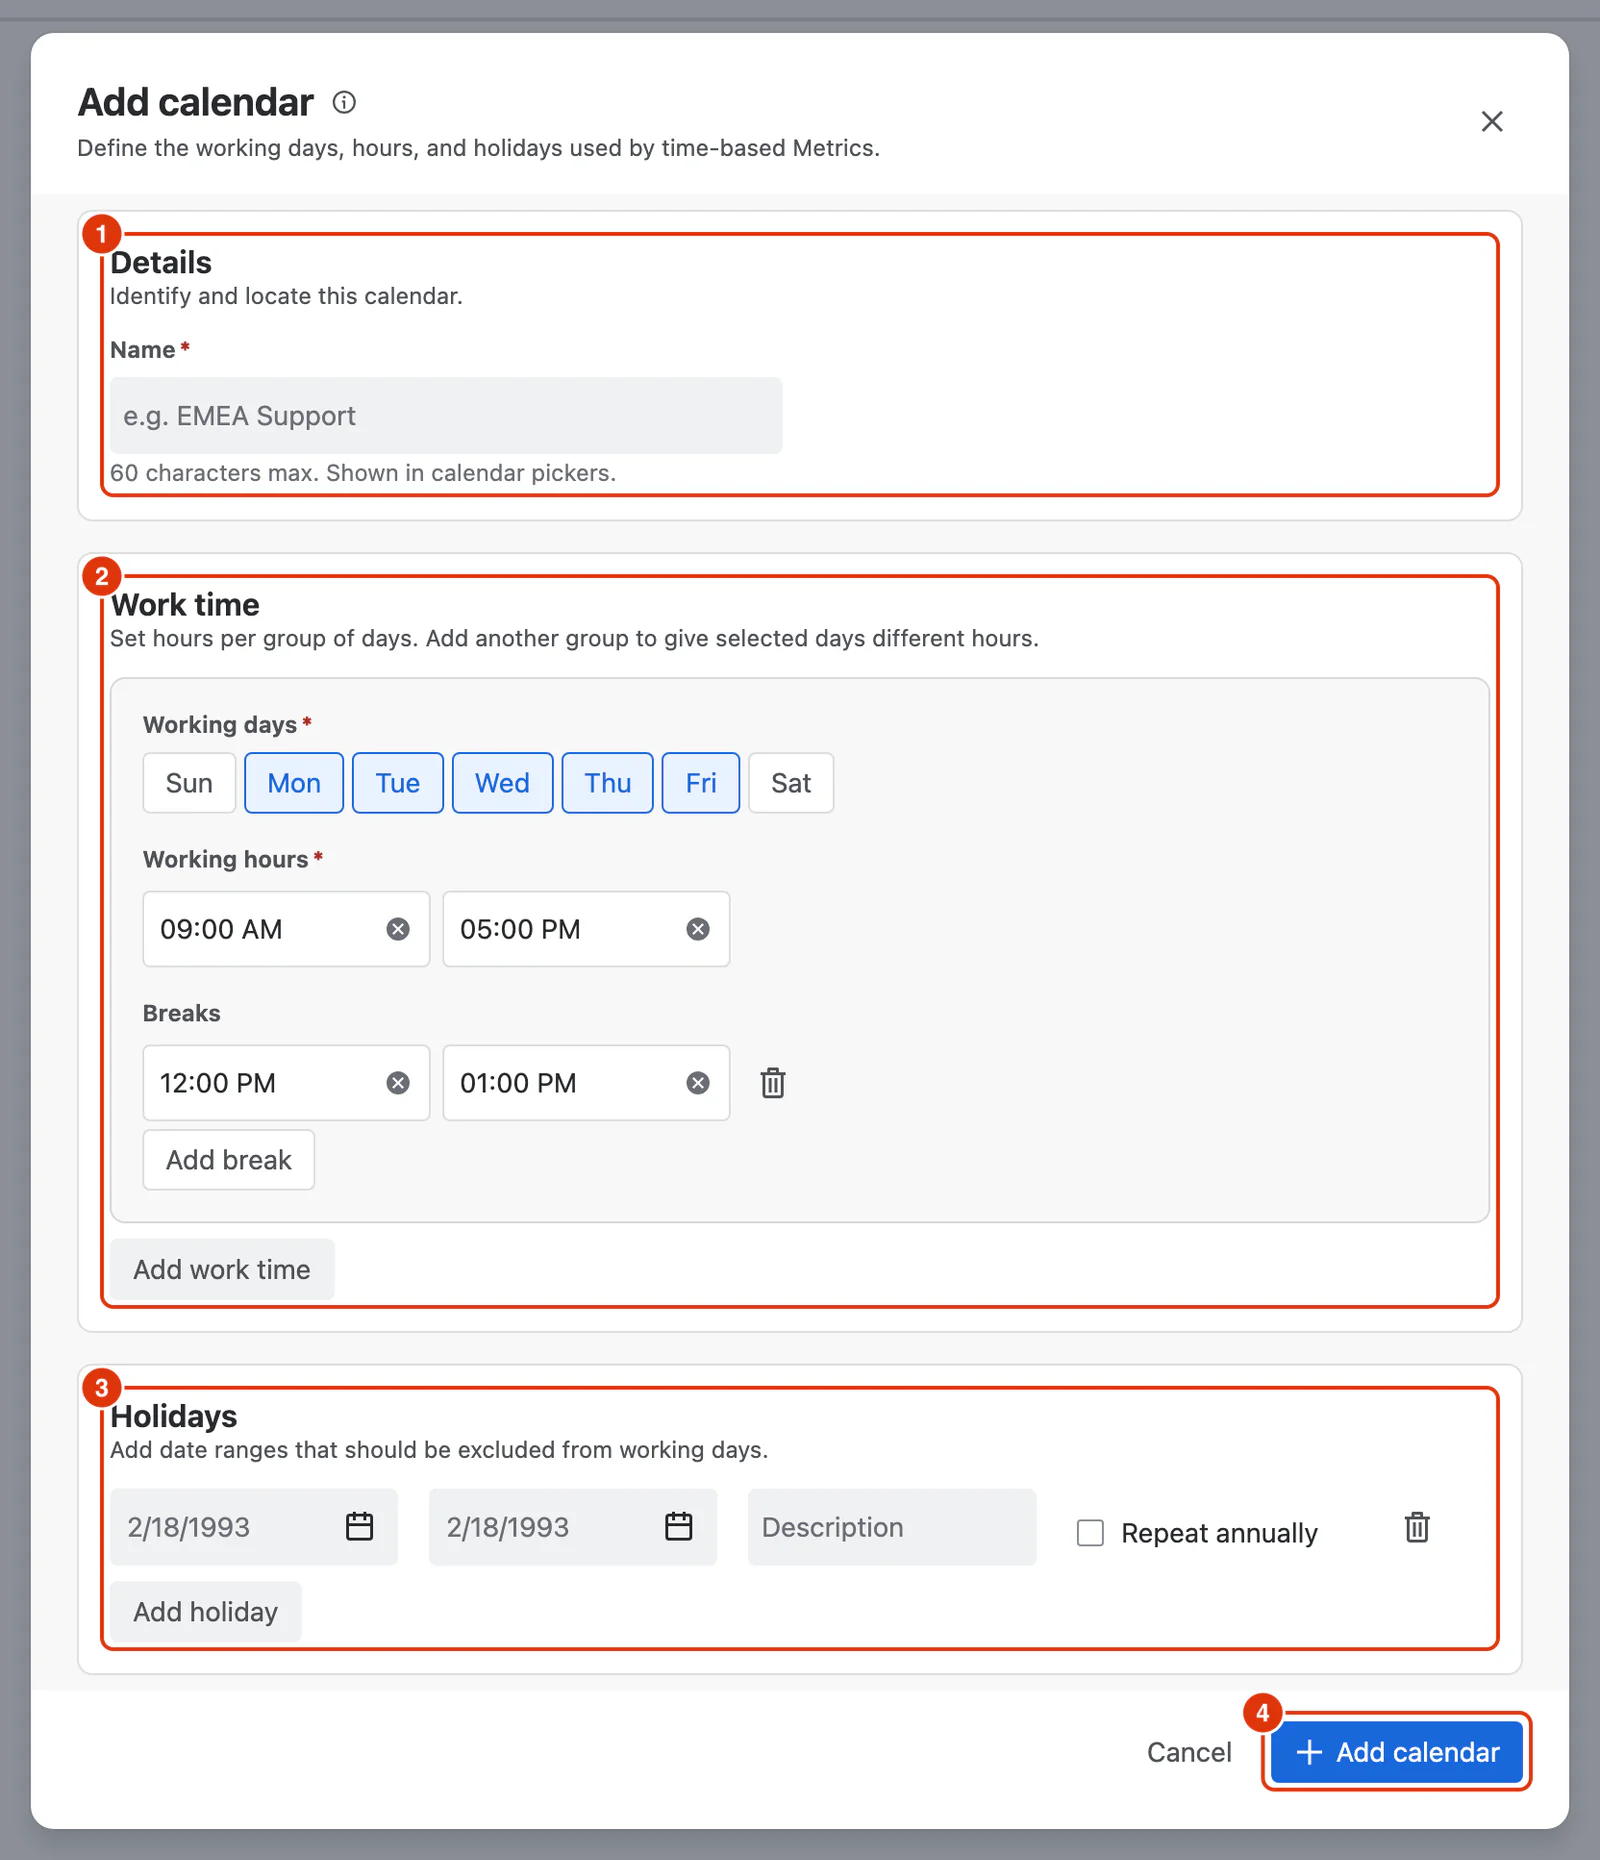
Click Add calendar to open the Add calendar dialog, then fill in its three sections:
- Details (1) — a Name for the calendar, such as "EMEA Support". Maximum 60 characters. This name appears in calendar pickers when configuring Metrics.
- Work time (2) — the Working days, the Working hours that apply to them (for example 09:00–17:00), and any Breaks, such as lunch, to exclude from working hours. Click Add break for another break, or Add work time to give a different group of days different hours.
- Holidays (3) — click Add holiday for each date range to exclude from working days. Each holiday takes a From and To date and an optional description; tick Repeat annually for one that falls on the same dates every year.
Then click Add calendar (4) to save it.
For a detailed breakdown of every option in the Add calendar dialog, see Add / Edit Calendar.
Managing a Calendar
Each row ends with three icons: Edit (1), Duplicate (2) and Delete (3).

Editing a Calendar
Click the Edit (pencil) icon (1) to open the calendar in the Edit calendar dialog. All fields can be updated; click Save changes when you are done. Changes apply immediately to any Metric that uses this calendar.
Duplicating a Calendar
Click the Duplicate icon (2) to create a copy named after the original, with "--COPY" added. This is useful when setting up calendars for teams with similar but slightly different schedules — duplicate an existing calendar, then edit the copy's name and whatever else is different.
Deleting a Calendar
Click the Delete (trash) icon (3), then confirm. Deleting cannot be undone. Calendars that are currently in use by a Metric should be reassigned before deletion.
Applying a Calendar to a Metric
Work Calendars are selected at the Metric level, not the report level. When configuring a time-based Metric (such as Cycle Time, Lead Time, or Time in Status), select a Work Calendar from the Metric configuration options.
This means different Metrics within the same report can use different calendars — useful when a report spans multiple teams operating on different schedules.
For more on configuring Metrics, see Metrics.