Sprint Report
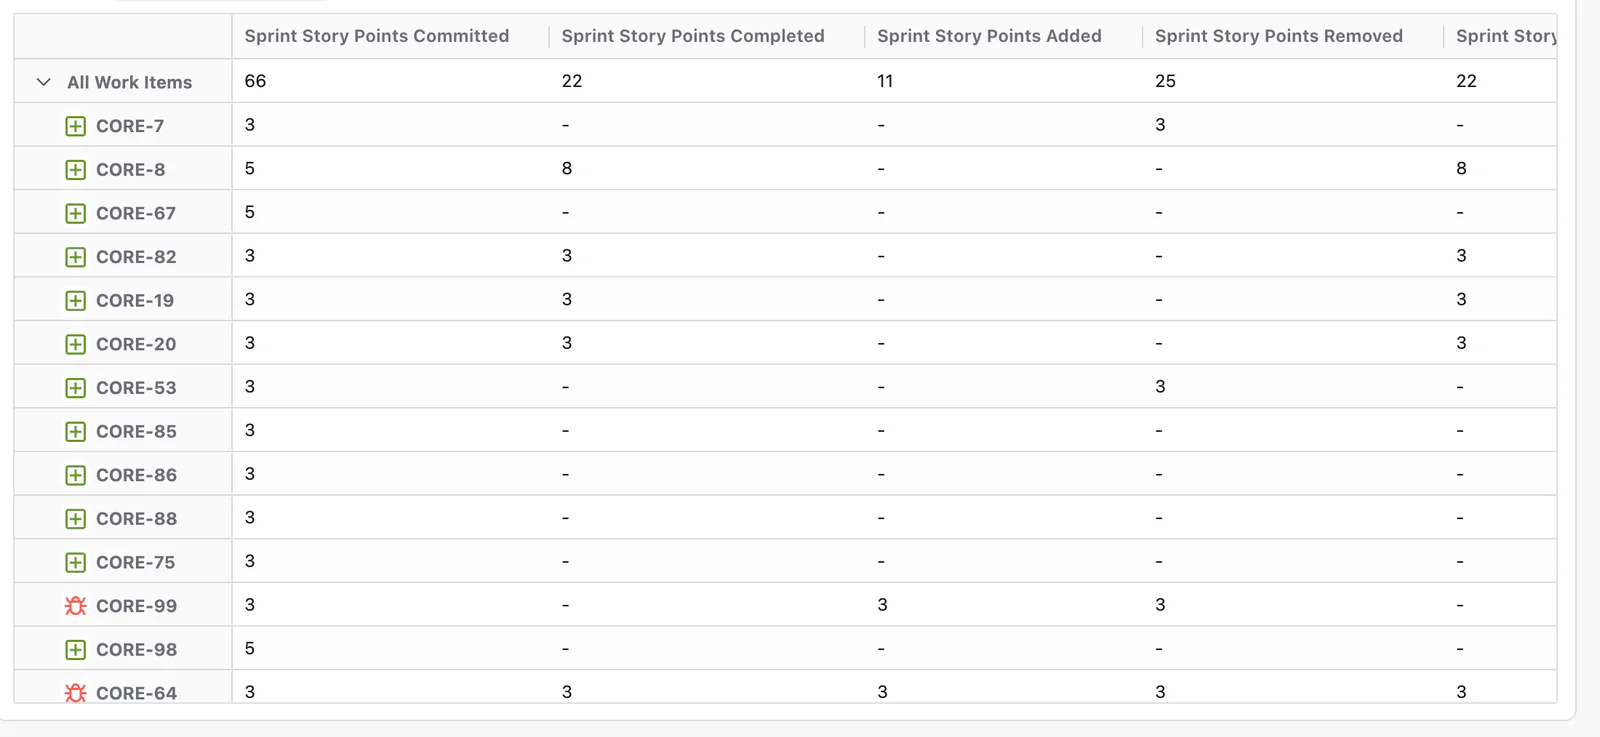
This report shows sprint-level metrics including story points committed, completed, added, and removed. It gives agile teams a clear picture of how well each sprint was planned and executed, and how scope changed during the sprint.
Start a report
- Go to Apps → Dashlytics in the Jira left sidebar, then click Home.
- Click Open Builder, then New in the toolbar, to start from a blank report.
- In the Data Source section, enter a JQL query scoped to the project whose sprints you want to report on —
project = <your project key>, with your own key in place of the placeholder. Click Search. - Click the Configure button to open the Configure report dialog.
Lay out the report
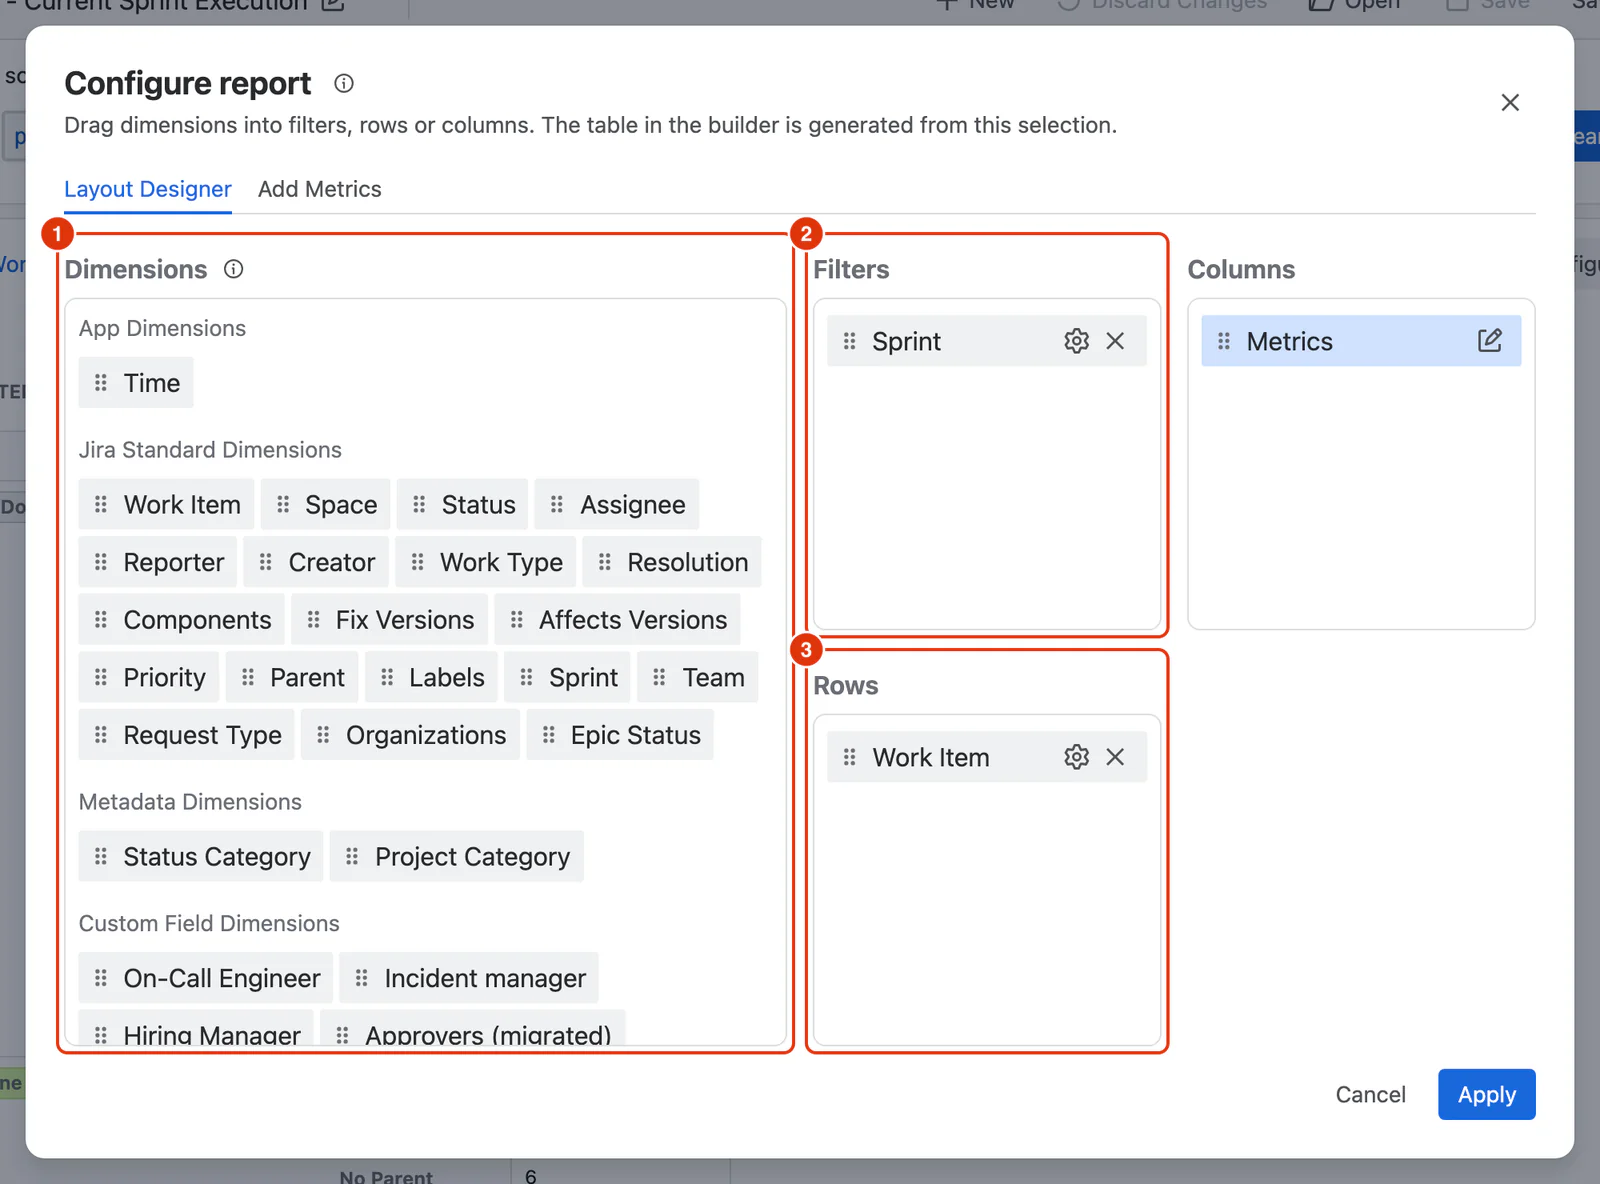
- In the Layout Designer tab, drag Work Item from the Dimensions list (1) into the Rows zone (3), so each work item becomes a row.
- Drag Sprint into the Filters zone (2), so readers can select which sprint to view.
Add the Metrics
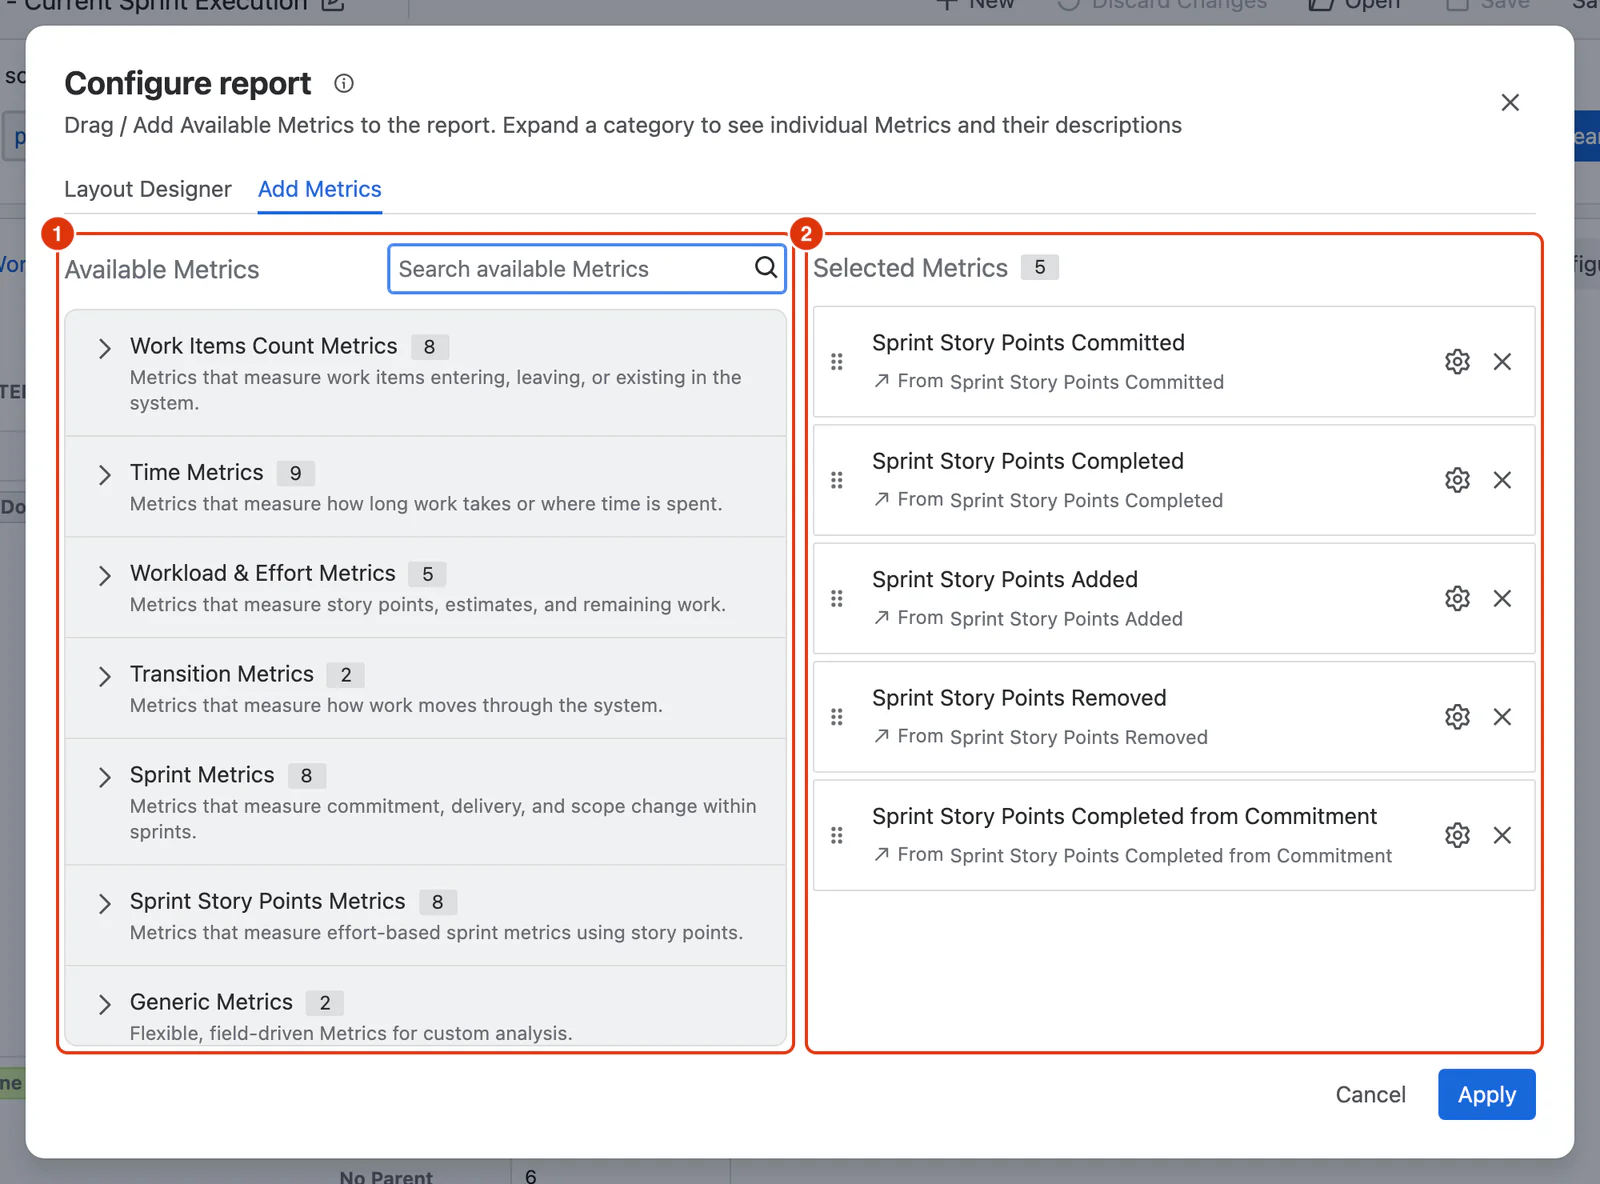
- Go to the Add Metrics tab. In Available Metrics (1), expand Sprint Story Points Metrics.
- Click + Add on each Metric you want. They appear under Selected Metrics (2), and become the report's columns in that order:
- Sprint Story Points Committed — story points at the start of the sprint.
- Sprint Story Points Completed — story points completed by the end of the sprint.
- Sprint Story Points Added — story points added during the sprint.
- Sprint Story Points Removed — story points removed during the sprint.
- Sprint Story Points Completed from Commitment — story points completed out of those originally committed.
- Click Apply to close the dialog and render the report.
- Use the Sprint filter chip above the report table to select the sprint you want to view.
- Click Save as in the toolbar, enter a report name, and click Save report.
Result
The top row totals the sprint; expand it to see each work item's contribution. A dash means the work item carried no points for that Metric.